Different venues have different requirements when it comes to visitors. Whether a venue has appointment-based visits or has visitors turning up without an appointment, the TENNER app has been designed to cover them all.
In the following article, we will look into the different ways you can screen and check in visitors with the TENNER Venue Check-in app.
Appointment based visits
For appointment-based visits, you can send a screening ahead of an appointment so that the visitor arrives at the venue they are ready to check-in.
1. Copy your landing page URL

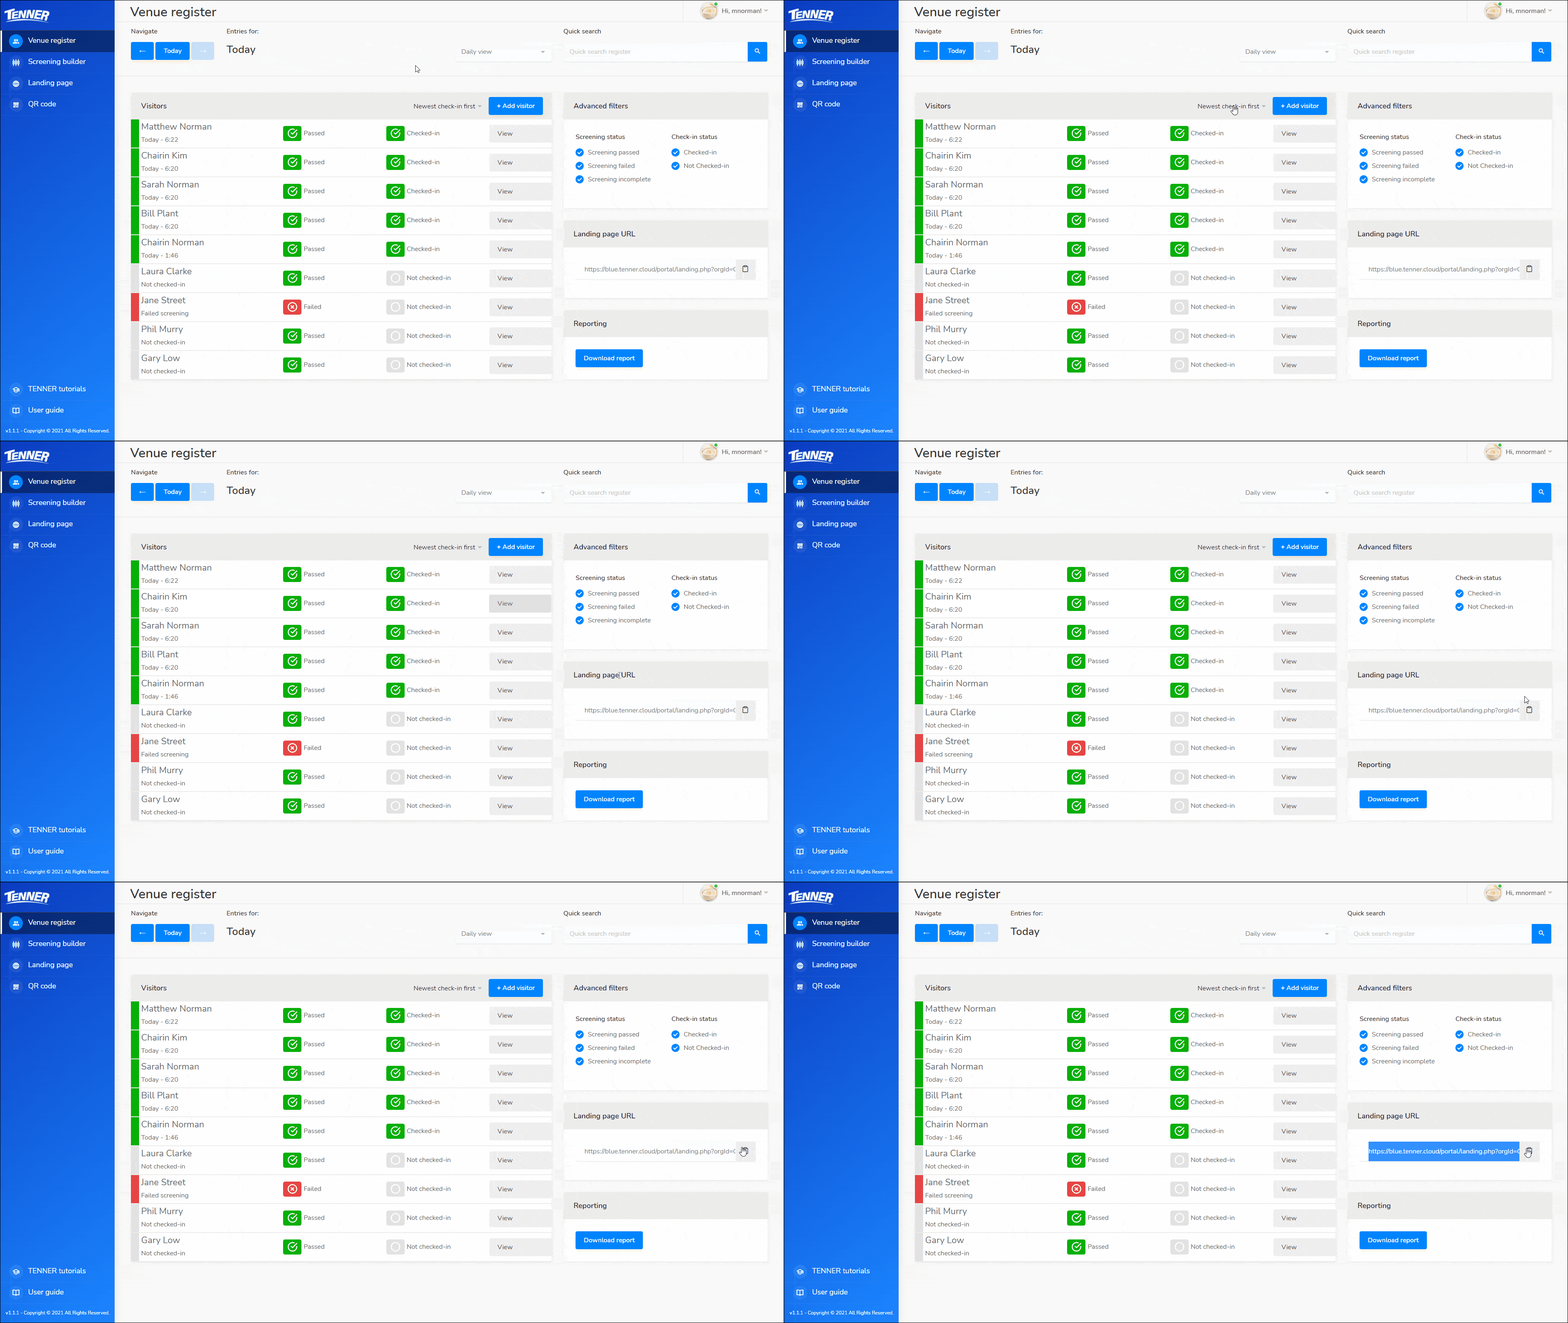
On the venue register page, click on the clipboard icon in the ‘Landing page URL’ section. The link will be copied to your clipboard.
2. Paste the URL into an email or booking system
If you use a booking system, most booking systems have a reminder or messaging system built-in. You can paste your link into the message template so your visitors will receive your link in their appointment reminder.
Alternatively, you can paste your link in any email or messaging services your venue uses to reach your visitors.
3. Set up a link on your website
We also recommend setting up a link on your website so you can easily direct customers to the screening if they are unable to receive the link via email.
This is especially useful for venues that do not use a booking or messaging system to reach their customers before an appointment.
If you need assistance doing this, drop us an email and we will be happy to help you – support@tenner.cloud
4. Recieve your visitors screenings
With the link, your visitors can simply follow TENNER Agent on your landing page to submit a screening. You’ll receive a notification for each screening that is submitted.
For visitors who can not access a computer, the screening can be done on arrival.
5. Check visitors in with your venue QR code
On arrival, visitors can scan your QR code at the entrance to your venue. If they scan the QR code with the same device they submitted the screening on, the TENNER agent will remember them and check them in them. If they are using a different device, the TENNER agent can confirm their identity and find thier screening by asking for the visitor’s email.
For visitors who have not submitted a screening, the TENNER agent will take them through a screening before they check in.
Walk-in based visits
For walk-in visits, the screening and check-in can be done together.
1. Have your QR code ready
On arrival, visitors can scan your QR code at the entrance to your venue. If they scan the QR code with the same device they submitted the screening on, the TENNER agent will remember them and check them in them. If they are using a different device, the TENNER agent can confirm their identity and find thier screening by asking for the visitor’s email.
For visitors who have not submitted a screening, the TENNER agent will take them through a screening before they check in.
2. Check in your visitors
On arrival, visitors can scan your QR code at the entrance to your venue. If they scan the QR code with the same device they submitted the screening on, the TENNER agent will remember them and check them in them. If they are using a different device, the TENNER agent can confirm their identity and find thier screening by asking for the visitor’s email.
For visitors who have not submitted a screening, the TENNER agent will take them through a screening before they check in.
Visitors without a smartphone
For visitors who have not got a smartphone or choose not to check-in via the TENNER Agent, you can check them in manually.
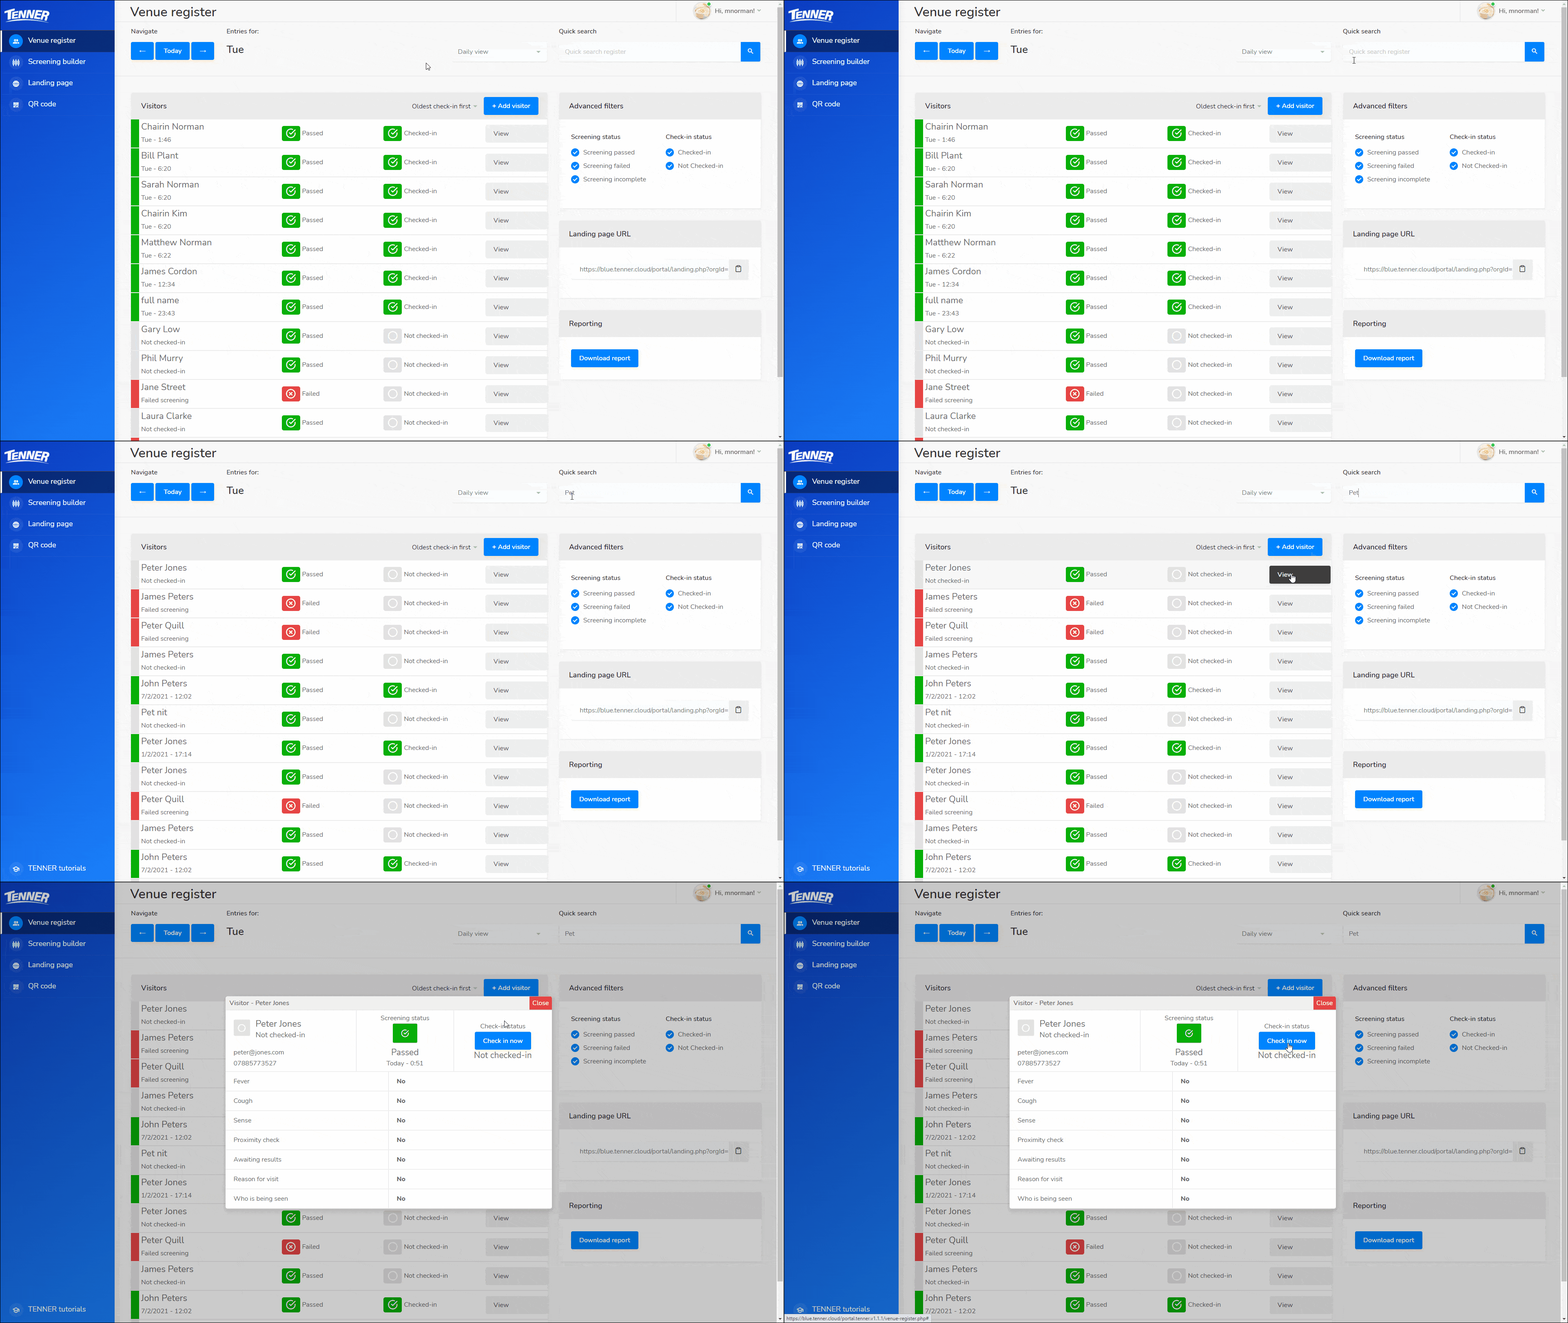
If the visitor has already submitted a screening, you can search for their name or email on the venue register page. Click the ‘view’ button on their record and press the ‘check in’ button to check them in.

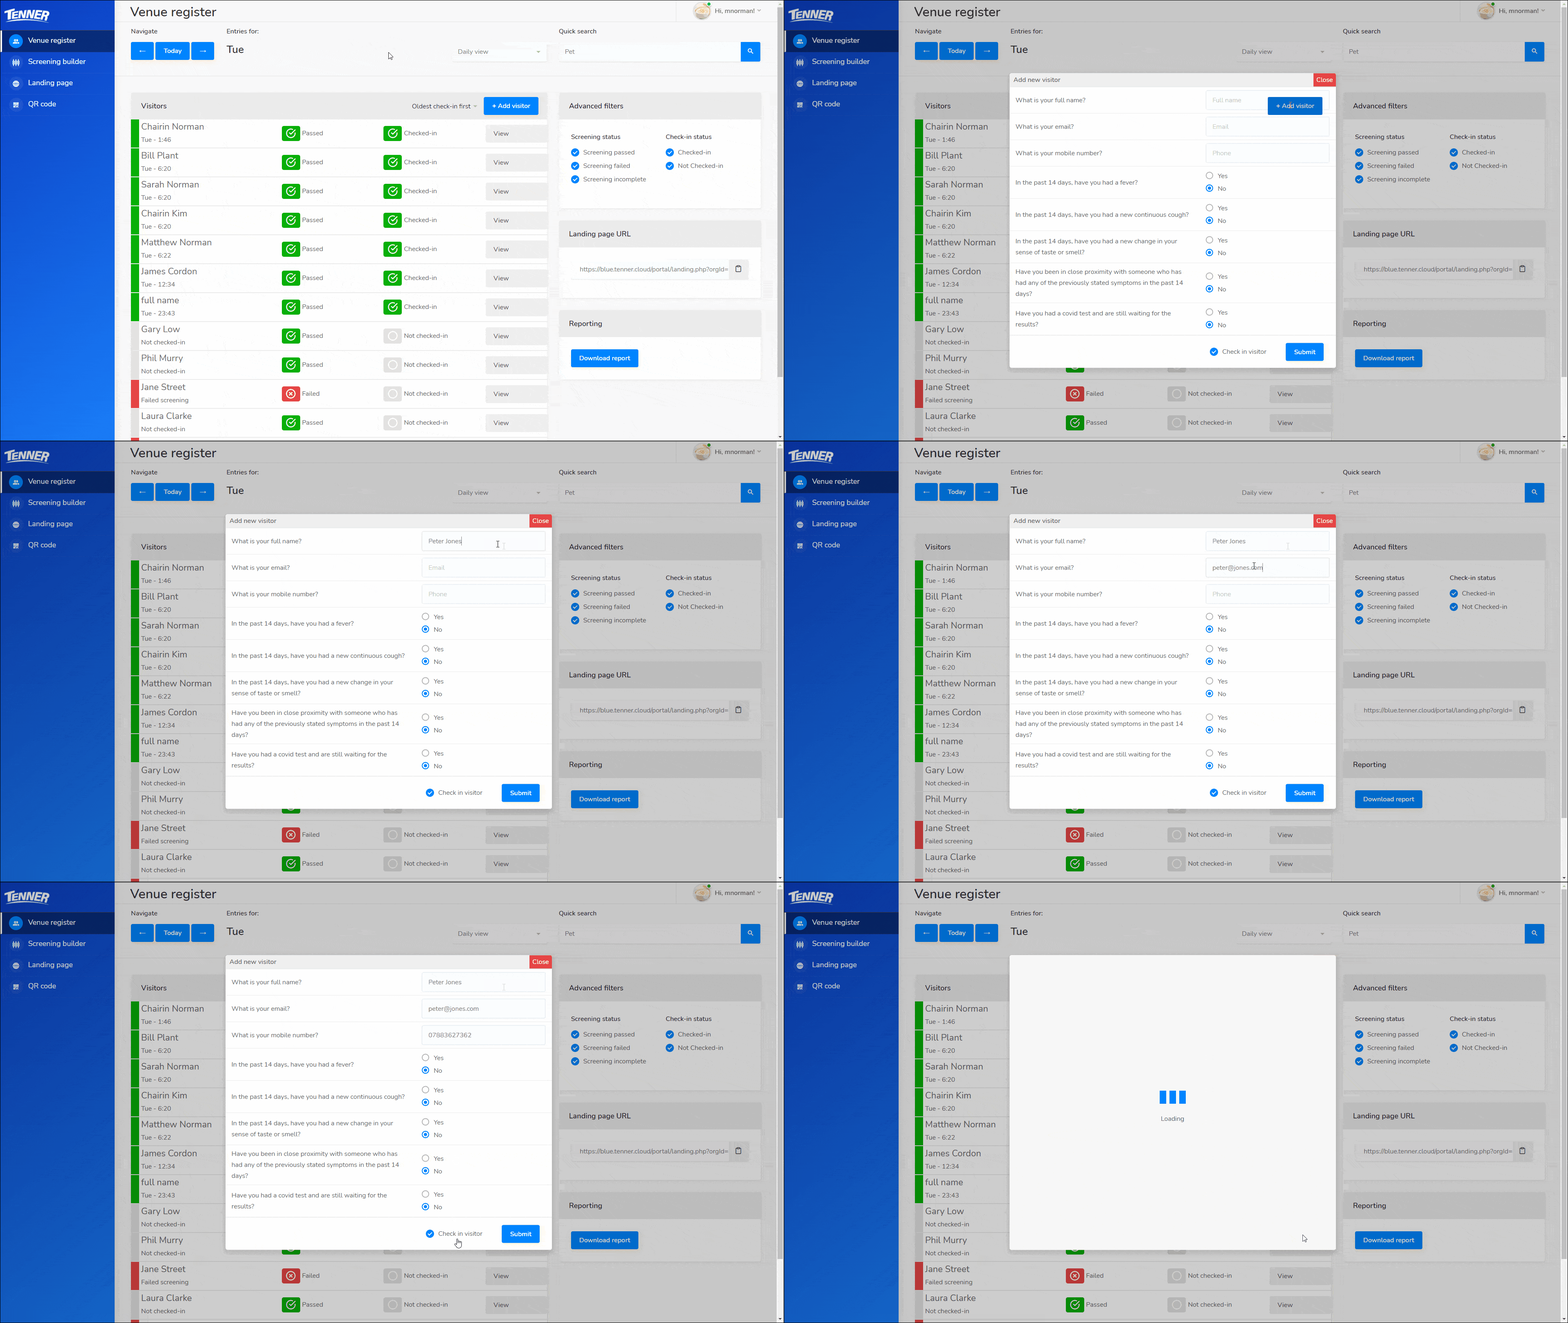
If the visitor has not submitted a screening you can manually screen them and check them in by pressing on the ‘+ Add visitor’ button on the venue register page and filling in the information.


